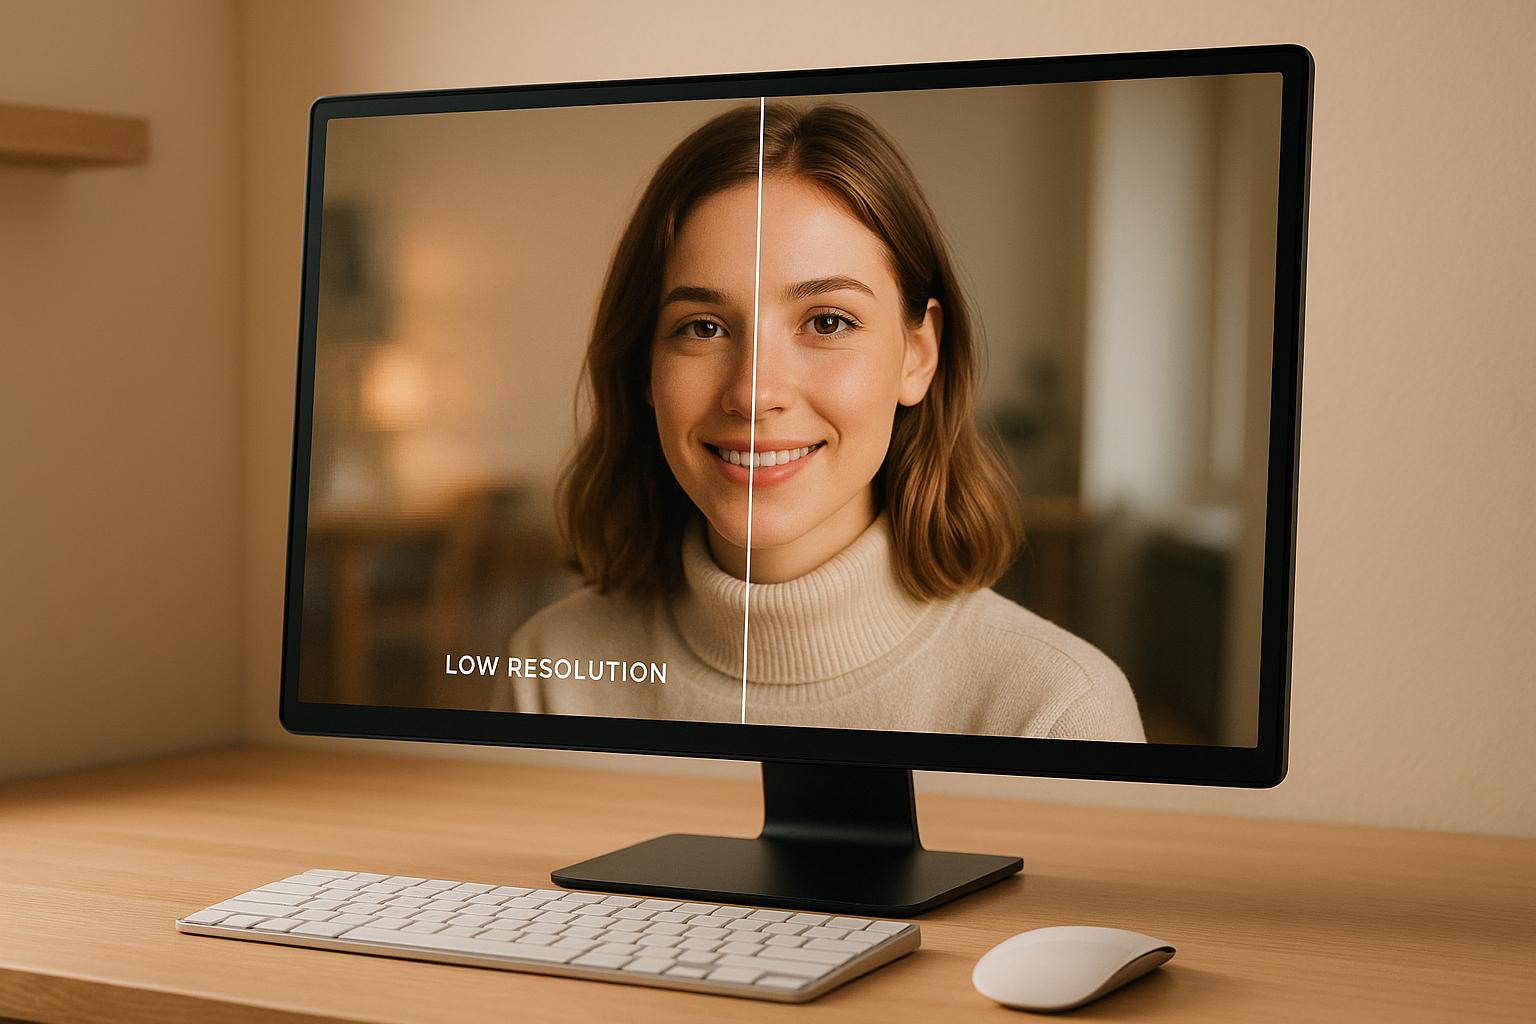
Low Resolution Photos: Quick Fix Solutions
Transform low-resolution photos into sharp, high-quality images effortlessly with AI-powered tools, enhancing your visuals for any purpose.
Low Resolution Photos: Quick Fix Solutions
Blurry photos ruining your visuals? Low-resolution images can hurt your brand, reduce engagement, and fail to showcase important details. Whether it’s for e-commerce, social media, or professional presentations, poor-quality visuals leave a bad impression - especially with today’s high-resolution screens like 4K and Retina displays.
The Quick Fix:
AI-powered tools like ImageUpsize can transform low-resolution photos into sharp, clear images in seconds. These tools analyze patterns in your image and fill in missing details, creating polished visuals without expensive software or technical expertise.
Key Points:
- Why it matters: Pixelated images damage credibility and reduce audience trust.
- Common causes: Over-compression, improper resizing, outdated devices, or repeated saving.
- AI solution: AI tools use advanced algorithms to upscale images while maintaining quality.
- How it works: Upload, choose a scaling factor (2x-6x), and download your improved image.
- Best practices: Start with the best-quality source image, apply basic edits, and choose the right output size for your needs.
AI tools like ImageUpsize make it simple to improve image quality quickly. Whether for social media, e-commerce, or personal projects, you can restore clarity and detail to your photos in just a few clicks. No watermarks, no hassle - just better visuals.
Best A.I. Image Upscaler? Top 7 Software Compared!
What Low Resolution Means and How It Affects Your Images
Low resolution refers to images with fewer pixels per inch than necessary for a clear and sharp display. Pixels are the tiny building blocks of any image, and when there aren’t enough of them, the result is often a blurry or blocky appearance. For web use, images typically need at least 72 pixels per inch (PPI), while print materials demand much higher clarity, usually 300 PPI or more.
When an image doesn’t meet these standards, several issues arise. The most noticeable is pixelation, where individual pixels become visible, creating jagged edges and a rough, uneven look. Fine details vanish, text becomes illegible, and smooth curves appear as stair-steps. Colors can also lose their vibrancy or look inaccurate due to insufficient pixel data.
But the problem isn’t just about appearances. Low-resolution images struggle when scaled up for larger screens or high-definition devices, leading to a poor viewing experience. These challenges often stem from a few common causes, outlined below.
What Causes Low-Resolution Images
Several factors contribute to low-resolution images:
- Excessive compression: Saving an image with high compression settings removes pixel data to reduce file size. Social media platforms and email systems often compress images automatically, significantly reducing their quality.
- Improper resizing: Shrinking an image and later enlarging it forces software to "guess" the missing pixels. This interpolation rarely restores sharpness, leaving the image soft and blurry.
- Outdated capture devices: Older digital cameras, webcams, and smartphones often produce lower-resolution images. For example, a 2010 camera might only capture 8-megapixel photos, while modern devices easily exceed 12 megapixels. Screenshots from low-resolution monitors also inherit these limitations.
- Repeated saving and incorrect export settings: Every time a JPEG file is saved, it undergoes compression, gradually degrading quality. Selecting the wrong export options, like "web quality" instead of "print quality", can also reduce resolution without obvious warnings.
Why Fast Solutions Are Important
The need to fix low-resolution images quickly is more pressing than ever, especially in professional and business contexts.
- Marketing campaigns: Timing is everything. When a trending topic arises, brands have just a few hours to create and share eye-catching visuals. Traditional editing methods can take up to an hour per image, whereas AI tools can enhance multiple images in seconds.
- E-commerce operations: Online retailers often receive low-quality product photos from suppliers. Enhancing these images quickly is crucial to updating catalogs and avoiding missed sales opportunities, especially during high-demand periods like Black Friday or the holidays.
- Professional presentations: Imagine getting a low-resolution logo or product image hours before a big pitch. There’s no time for complex edits - yet the visuals still need to look polished and professional.
- Social media visibility: Platforms like Instagram and Facebook prioritize sharp, engaging visuals. Posting blurry or pixelated images can hurt reach and engagement, reducing the effectiveness of your marketing efforts.
- Client expectations: With high-resolution displays now the norm, what looked acceptable a few years ago might seem outdated today. Delivering crisp, high-quality visuals quickly is essential for maintaining client trust and securing new opportunities.
These scenarios highlight why fast, AI-driven solutions have become indispensable for addressing low-resolution image challenges. They save time, meet modern quality standards, and keep businesses competitive.
How AI Image Upscaling Works
AI upscaling is a game-changer for fixing low-resolution photos. Unlike traditional methods that simply stretch pixels and often leave images blurry, AI-powered tools take a smarter approach. They analyze the image, detect patterns, and fill in missing details with precision.
Here’s how it works: AI examines pixel patterns to identify edges, textures, colors, and structural elements. Using this data, it generates new pixels that blend naturally with the original image. For example, if you upscale a blurry photo of a face, the AI doesn’t just enlarge the blur - it reconstructs features like skin texture, facial details, and other fine elements that were lost in the low-resolution version.
What sets AI upscaling apart is its ability to enlarge images without sacrificing quality. Traditional upscaling methods often produce soft or fuzzy results, but AI maintains sharpness and can even enhance details that weren’t clear in the original image. From photos and artwork to logos and technical diagrams, AI can handle a wide range of image types.
The Technology Behind AI Image Upscaling
AI image upscaling is powered by deep learning neural networks trained on millions of image pairs. These systems study both low-resolution and high-resolution versions of the same image to learn how details should look when accurately rendered. For instance, the AI might analyze a low-res photo of a building alongside its high-res counterpart, learning how windows, brick textures, and shadows should appear.
Modern upscaling tools use convolutional neural networks (CNNs), which are particularly good at recognizing spatial relationships between pixels. This allows them to detect complex patterns that traditional algorithms simply can’t.
The training process involves enormous datasets containing millions of images, covering everything from portraits and landscapes to architectural shots and abstract art. Thanks to this extensive training, AI tools are equipped to enhance virtually any kind of image - whether it’s a family photo, a professional marketing graphic, or a piece of digital artwork.
These technological advancements make it possible for AI tools to deliver fast, high-quality enhancements that were once impossible.
Benefits of AI Tools for Image Improvement
AI upscaling has redefined image enhancement, turning what used to be a time-intensive process into something fast, reliable, and accessible.
Speed and efficiency are major advantages. Tasks that might take a human editor 30-60 minutes per image can now be completed in seconds, with AI processing multiple images simultaneously. This is especially valuable for businesses managing large image collections or professionals working on tight deadlines.
Another key benefit is consistent quality. Unlike human editors, whose results can vary depending on skill level or time constraints, AI tools deliver reliable, high-quality results every time. This ensures professional standards are maintained, no matter the volume of images being processed.
AI tools are also incredibly versatile. Whether you’re resizing images for web use at 72 PPI or preparing high-resolution files for print at 300 PPI, AI upscaling adjusts seamlessly while preserving quality. This eliminates the need for multiple tools or complex workflows.
Ease of use is another standout feature. Traditional photo editing often involves multi-step processes and technical expertise. With AI upscaling, all you need to do is upload an image, choose a size, and download the enhanced version - no special skills required.
Finally, AI tools are cost-effective, making professional-grade image enhancement accessible to everyone. Instead of hiring graphic designers or investing in expensive software, small businesses, freelancers, and individuals can achieve high-quality results at a fraction of the cost.
What’s more, AI upscaling ensures the preservation of original characteristics. It keeps the image’s color palette, lighting, and artistic style intact while adding clarity and detail. This means family photos retain their emotional essence, and business images maintain their polished, professional look - all with improved sharpness and accuracy.
sbb-itb-b6ad462
How to Fix Low-Resolution Photos with ImageUpsize
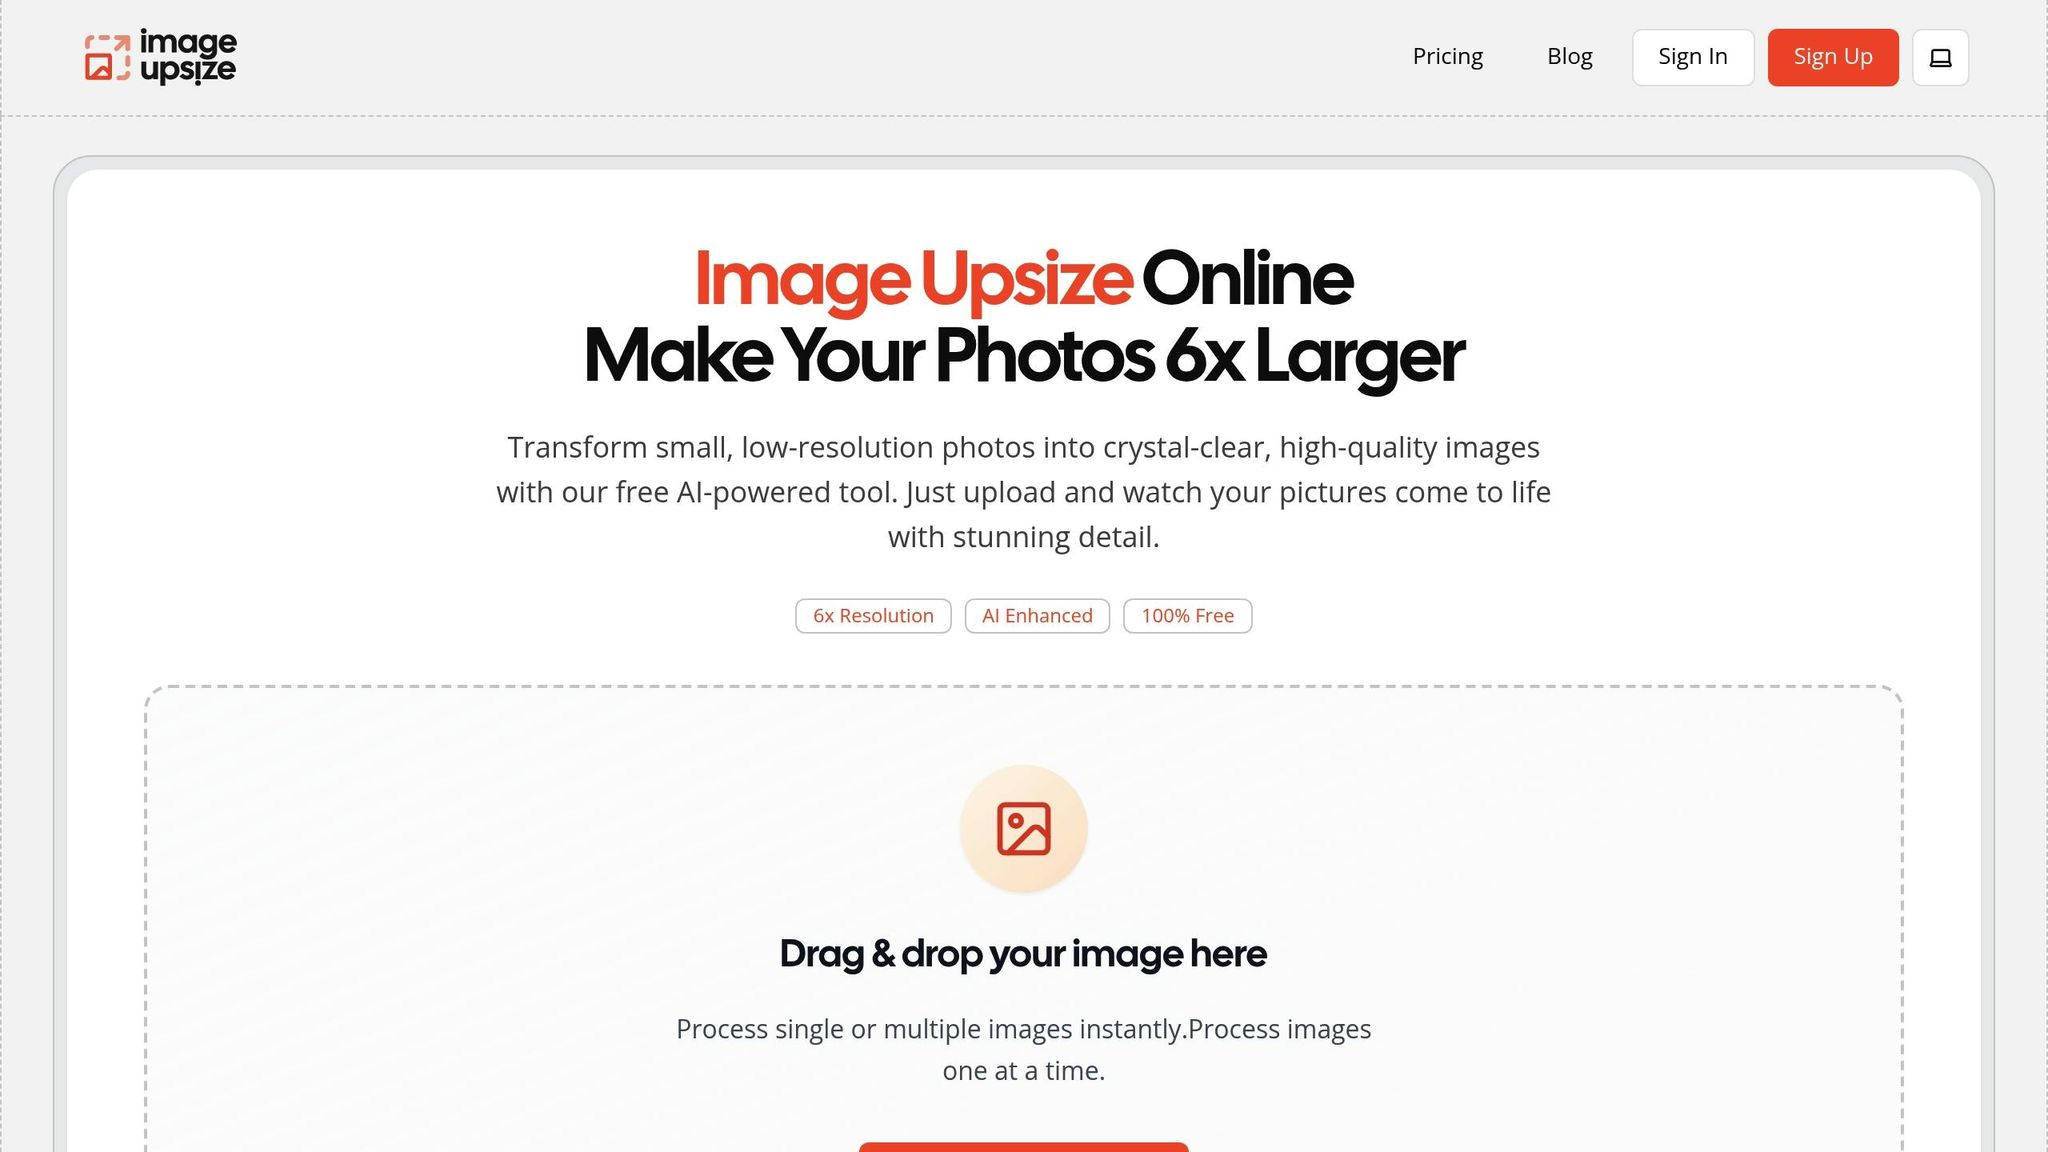
If you're looking for a quick way to improve low-resolution images, ImageUpsize has you covered. This AI-powered tool makes it easy to enhance photos without needing expensive software or advanced technical skills. Whether it’s a cherished family photo, a business graphic, or a creative project, ImageUpsize can bring your low-quality images back to life.
"Transform small, low-resolution photos into crystal-clear, high-quality images with our free AI-powered tool. Just upload and watch your pictures come to life with stunning detail." - ImageUpsize.com
With just three simple steps, ImageUpsize can handle everything from portraits and landscapes to product photos and marketing materials, delivering impressive results every time.
Key Features of ImageUpsize
ImageUpsize packs a range of features designed to make photo enhancement simple and effective. Here's what makes it stand out:
- Flexible Upscaling Options: Resize images by 2x to 6x their original size without losing quality. This flexibility allows you to choose the enhancement level that best suits your needs.
- Broad Format Support: Compatible with common image formats like JPG, PNG, and WEBP, so you can work with a variety of files effortlessly.
- Batch Processing: Save time by uploading multiple photos at once. You can even apply different scaling levels to each image - perfect for managing product catalogs or editing client galleries.
- Privacy Protection: Your images are secure. All uploaded photos are automatically deleted from ImageUpsize servers within one hour, ensuring both professional and personal data stays private.
- Fast Processing: Most images are enhanced in just 10–30 seconds, giving you near-instant results and the ability to make quick adjustments if needed.
- No Watermarks: Enhanced images are ready for professional use with no watermarks, and you retain full commercial-use rights.
These features make ImageUpsize a practical solution for anyone looking to enhance their photos quickly and efficiently.
Step-by-Step Guide to Using ImageUpsize
Getting started with ImageUpsize is refreshingly simple. There’s no need to create an account or download software - everything happens right in your web browser. Here’s how it works:
- Upload Your Photo: Drag and drop your image onto the ImageUpsize website. The tool supports a wide range of photo types, from casual snapshots to professional images. A preview will confirm your file has loaded correctly.
- Choose Your Scale: Select the magnification level you need, ranging from 2x to 6x. For web use, 2x or 3x often works well, while printed materials may require 4x to 6x for optimal quality. Once you’ve made your choice, click "Upsize" to start the enhancement process. The AI analyzes your image to detect patterns and textures, reconstructing missing details and improving clarity. A progress bar keeps you updated as the enhancement takes place.
- Download Your Enhanced Image: After processing, you’ll see a side-by-side preview to compare the original and enhanced versions. If you’re happy with the result, download the image instantly - no watermarks, no hassle.
For those working with multiple images, the batch processing feature simplifies the workflow. Just upload several photos at once, and you can apply different scaling options to each one as needed.
The free plan includes 20 monthly credits, with each enhancement using one credit. Signing up for a free account doubles your credits and unlocks extra batch processing features, making it even easier to manage larger projects.
Best Practices for Better Image Results
Start with the best quality image you have. Clean it up, reduce noise, adjust the color and exposure, and crop it to highlight the most important parts.
How to Prepare Images Before Upscaling
Always begin with the original file rather than compressed versions from social media or email. Even minor differences in the quality of the source image can significantly affect the final result.
Apply basic edits like noise reduction to prevent grain from becoming more noticeable during upscaling. Simple adjustments to brightness, contrast, or color saturation can take an average result and turn it into something much better.
Cropping is another key step. Removing unwanted elements or distracting backgrounds helps the upscaler focus on enhancing the details that matter most in your image.
How to Choose the Right Output Size
Once your image is ready, pick a scaling factor that suits your needs.
For web or social media use, 2x or 3x scaling sharpens images without creating excessively large files. For print, you may need more aggressive scaling, but keep in mind that higher scaling factors take longer to process and result in larger file sizes.
For professional materials, the ideal scaling factor often depends on the purpose. E-commerce product photos might benefit from 3x or 4x scaling to ensure fine details are crisp and clear, while decorative or background images may only need a 2x enhancement. If you're using ImageUpsize's free plan, remember there's a 10MB file size limit, so adjust your scaling factor accordingly.
How to Check Your Improved Images
After upscaling your image with ImageUpsize, take the time to closely review the results.
Zoom in to inspect the image at full size. This helps you spot any issues, such as unwanted artifacts, over-sharpening, or areas where textures might not have been properly enhanced.
Compare the upscaled image with the original. Look for improvements in clarity and sharpness - edges should be more defined, and the overall image should appear crisper. Fine details should stand out, and pixelation should be reduced or eliminated.
Pay close attention to noise and grain. A successful upscaling process will minimize these distractions while keeping the image's natural look intact. If you notice new artifacts or unexpected patterns, it may be worth trying a different scaling factor or revisiting the preparation of your source image.
Finally, make any necessary manual tweaks to brightness, contrast, or color balance. If the result isn't what you hoped for, adjusting your approach - whether by refining the source image or experimenting with different settings - can lead to a better outcome.
Conclusion: Fix Your Images with ImageUpsize
Blurry, low-resolution photos don't have to stay that way. With AI-powered upscaling, you can turn old, pixelated, or unclear images into sharp, professional-quality visuals. Whether it's cherished family photos, small product images, or graphics that need a boost, this technology offers a quick and efficient way to breathe new life into your pictures.
ImageUpsize makes the process straightforward. It supports up to 6x scaling, allows for batch processing, and delivers results in minutes. Plus, it works with popular formats like JPG, PNG, and WEBP. Your privacy is protected too - images are automatically deleted within an hour of processing. These features make it easy to enhance your images without hassle.
To get the best results, start with the highest quality source image you have, make any necessary edits beforehand, and choose the right scaling factor. This approach ensures your images are primed for optimal enhancement.
One standout feature of ImageUpsize is its free plan, which includes 20 credits per month and supports file sizes up to 10MB - perfect for personal and commercial projects alike. And the best part? No watermarks. While AI image upscaling is constantly improving, the golden rule remains: quality input equals quality output. By combining ImageUpsize's advanced AI capabilities with proper preparation, you can restore and elevate images you once thought were beyond repair.
Whether you're refreshing your website, creating marketing materials, or preserving treasured memories, ImageUpsize equips you with the tools to turn pixelated images into crisp, impactful photos. It’s a simple yet powerful solution that keeps up with the growing demands of image enhancement.
FAQs
How does ImageUpsize use AI to improve the quality of low-resolution photos?
ImageUpsize leverages AI-driven algorithms to transform low-resolution photos into sharper, clearer versions. By carefully analyzing patterns, textures, and details, the system creates new pixels that integrate smoothly with the original image, maintaining its natural look and feel.
This technology also minimizes noise and avoids typical problems like blurring or unwanted artifacts. The result? A polished, high-quality image that's ideal for everything from personal keepsakes to professional projects.
How can I prepare my photos to get the best results with ImageUpsize?
To get the most out of ImageUpsize, start with images that are already detailed and clear. Photos that are heavily compressed or pixelated can make it harder for the AI to upscale effectively.
Before uploading, it’s a good idea to make a few basic edits. Adjusting sharpness and reducing noise with simple photo editing tools can make a big difference. These small tweaks help prepare your images for upscaling, ensuring the results look as polished as possible.
What should I keep in mind when using ImageUpsize for professional projects?
When working on professional projects with ImageUpsize, it's important to note that processing times will depend on the image size and the resolution you choose. Larger files or higher-resolution upgrades might require more time to process.
Also, while ImageUpsize aims to produce excellent results, the quality of the final image heavily relies on the clarity and detail of the original. To achieve the best possible outcome, start with the highest-quality source images you can provide.